Winterizing your RV is essential, especially when temperatures drop. Many RVers think of antifreeze and RV covers, but protecting your water hose is just as crucial. Whether you’re storing your travel trailer or living in it through the winter, preventing your water hose from freezing is a key step. This guide focuses on preparing your Travel Trailer Water Hose for winter living, ensuring a continuous water supply even in cold climates.
Understanding RV Winterization: Living vs. Storage
It’s important to differentiate between winterizing for storage and winterizing for living. When storing your RV in freezing temperatures, the goal is to completely remove water from the system to prevent burst pipes and damage. However, when living in your RV during winter, you need to maintain a functional water system while preventing freezing. This article will concentrate on the latter: preparing your water hose for RV winter living.
My own experience includes both scenarios. Having winterized my travel trailer for storage and also prepared it for winter living, I understand the nuances of each. While I had assistance with the storage winterization process, my direct experience with preparing the water hose for winter living allows me to provide a practical, step-by-step guide.
This article is the first part of a series. Here, we’ll detail how to prepare your travel trailer water hose. The subsequent article will cover sewer line preparation and other essential RV components like the water heater, furnace, and internal plumbing pipes.
Setting the Scene: My First Winter RV Experience
When I first picked up my travel trailer in Tennessee, my immediate destination was Walla Walla, Washington. Friends who were already full-time RVers offered invaluable support and experience. My friend’s husband, particularly handy, became my mentor, guiding me through the intricacies of RV maintenance.
Starting my RV life surrounded by experienced friends was a blessing. Everything about RVing was new to me, and I was deeply grateful for their help. In my initial excitement, I hadn’t even considered the weather conditions in Washington.
During my two-month stay, Walla Walla experienced significant snowfall and a severe ice storm. Having lived in Alaska for 25 years, I was surprised by how unprepared I felt for this ice storm. It was so intense that Solstice, my companion, slipped on icy steps, prompting me to carpet the RV steps for safety. While the ice was short-lived, the snow persisted, highlighting the need for proper winter preparation.
Shortly after arriving at the RV park, my friend’s husband immediately began preparing my travel trailer for winter living, focusing on protecting it from the anticipated cold. This hands-on introduction plunged me directly into the world of RV winterization for living.
The Core Principle: Preventing Frozen Lines
The fundamental principle of preparing your RV for cold weather living is simple but critical: prevent your water lines from freezing. This includes not only the external water hose connecting to the park’s water supply but also the internal plumbing that distributes water throughout your travel trailer.
While various methods exist for protecting internal plumbing, preparing the external water hose for freezing temperatures typically involves a consistent approach. Let’s delve into this essential first step.
Preparing Your Travel Trailer Water Hose: A Step-by-Step Guide
The good news is that preparing your water hose for cold temperatures is straightforward and relatively inexpensive. You can typically acquire all the necessary materials for under $50, potentially slightly more if you require a longer heat cable.
Here’s what you’ll need:
- Water pipe heat cable: Choose a length appropriate for your hose.
- Foam pipe insulation: Sufficient to cover the length of your hose and the water source pipe.
- Insulation tape: To seal the foam insulation.
- Foam faucet cover: Two covers, one for each hose end.
- Extension cord: Outdoor rated, if needed, to reach a power outlet.
Although I diligently photographed the supplies and the final setup, I regret not documenting the step-by-step process itself. As a novice RVer and blogger, capturing detailed instructions was still a learning curve. My apologies for the lack of in-process photos, but the following guide will provide clear directions.
Step 1: Applying the Water Pipe Heat Cable
Wrap the water hose with the water pipe heat cable. Your heat cable should come with specific instructions, so always refer to those first. Generally, heat cables have a sensor or control box near the plug end. The section from this sensor to the plug is typically unheated, while the cable from the sensor to the opposite end is the heated portion.
Position the sensor against the water source pipe coming from the ground, close to the ground level. Wrap the heat cable upwards along the water source pipe and then continue wrapping it along the entire length of your travel trailer water hose, all the way to the connection point on your RV.
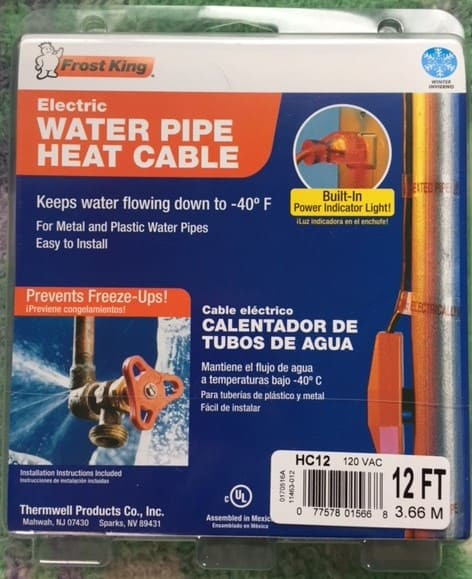 Package of water pipe heat cable.
A 12-foot heat cable worked for my setup, but ensure you measure your hose and water source to get the correct length for your needs.
Step 2: Insulating with Foam Pipe Insulation
Cover the hose and heat cable with foam pipe insulation and seal it with tape. While the heat cable prevents freezing, insulation enhances protection and improves efficiency. Insulating the hose and heat cable makes the system more effective and adds an extra layer of defense against the cold.
If your foam pipe insulation isn’t pre-split, use a sharp utility knife to carefully cut it lengthwise. Enclose the entire water hose, from end to end, with the foam insulation. Also, insulate the exposed section of the water source pipe coming from the ground. Secure the foam insulation with tape, sealing all seams to prevent moisture and cold air infiltration.
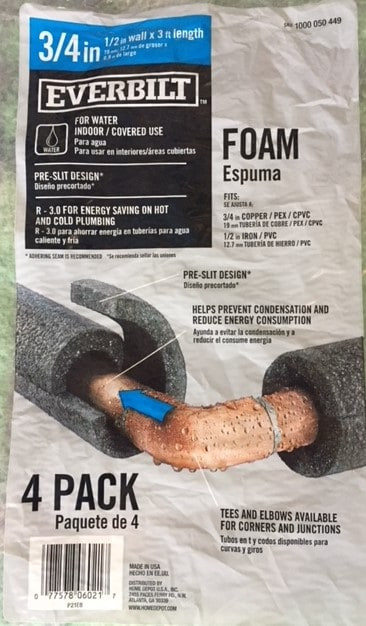 Packaging for pipe foam insulation.
Foam pipe insulation typically comes in 3-foot sections. Calculate the length you need and purchase accordingly to cover your entire hose and water source pipe.
If foam pipe insulation is unavailable, a pool noodle can serve as a temporary alternative. While it may not offer the same level of heat retention, it provides a protective layer. I’ve previously written about various uses for pool noodles in RV life, and while hose insulation wasn’t originally on that list, it’s a viable emergency solution.
Step 3: Protecting Hose Ends with Foam Faucet Covers
Cover both ends of the water hose with foam faucet covers. These covers provide crucial insulation at the connection points, which are often more exposed to the elements.
At the water source end, the faucet cover can often simply sit on top, using gravity to stay in place. However, at the RV connection end, you’ll need to secure the cover more firmly. Use tape, preferably painter’s tape (which is less likely to damage your RV’s finish compared to duct tape), to ensure the foam cover stays securely in place, protecting the connection from freezing temperatures.
Once everything is in place, plug in the heat cable. Test your setup and monitor it for a few days, especially during temperature fluctuations, to ensure it’s functioning correctly and ready for freezing conditions.
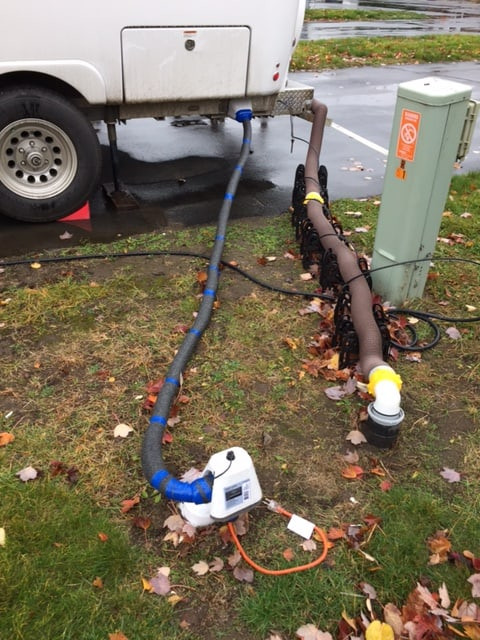 While camper hooked up to sewer and a water hose that has been winterized.
The completed winterized water hose setup. Remember to plug in the heat cable to activate the freeze protection.
Essential Tips and Considerations for Water Hose Winterization
Preventing drips is crucial. Before winterizing your hose, inspect and consider replacing the rubber washers in your hose connections to ensure a watertight seal. Even minor drips can freeze and cause problems in sub-freezing temperatures. Always use a water pressure regulator to protect your RV’s plumbing system. As I learned firsthand, failing to use a pressure regulator can lead to damage, and in winter, such damage can be exacerbated by freezing.
Position the seam of the foam pipe insulation facing downwards. This simple step helps prevent snow and ice from accumulating inside the insulation, maintaining its effectiveness.
These instructions assume a water source pipe rising vertically from the ground. If your water source is at ground level, adapt the steps accordingly to ensure all exposed parts are insulated and heated. As seen in the final photo, my water source was close to the ground, requiring adjustments to the insulation approach.
If you plan to RV in winter regularly, consider purchasing a longer heat cable. A cable that’s just sufficient for your current location might be too short for future campsites, leading to unnecessary replacement costs. Planning for flexibility is wise.
Many RV parks in regions with freezing winter temperatures have specific winterization requirements for guests. These guidelines are not just for your benefit but also to protect the park’s infrastructure. Parks will often provide instructions and sometimes even assistance to ensure everyone properly prepares for winter RV living. The RV park in Walla Walla, for instance, provided a helpful graphic with water line winterization instructions.
Alternative Approach: Disconnecting the Hose
A simpler alternative to a heated and insulated hose is to disconnect it entirely. Instead of relying on a continuous water hookup, you can fill your RV’s fresh water tank and use your onboard water pump. This is similar to how you manage water when boondocking.
Remember, even if you disconnect the hose, you still need to address winterizing the internal plumbing within your RV, which will be covered in the next article.
This method worked well for me during a winter stay in New Mexico. Nighttime temperatures were generally cold but not consistently below freezing. For brief periods when temperatures dipped into the 20s, I simply disconnected the water hose. This was convenient as my water needs were minimal, with showers taken at the bathhouse each morning.
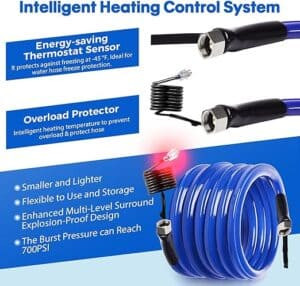
Quick Update: Heated Water Hoses
Since writing the original post, I’ve discovered a convenient product that simplifies water hose winterization considerably: heated water hoses. These hoses have a built-in heating system. You simply plug them in, and they provide freeze protection, eliminating the need for separate heat cables and insulation.
While heated water hoses are a more expensive upfront investment, the convenience they offer might be worthwhile. While traditional methods with heat cables and insulation remain common in cold-weather RV parks, heated water hoses represent a potentially easier and more efficient solution for travel trailer water hose winterization.
RV Winter Living Prep: Part I Conclusion
If you have experience winterizing your RV water hose in different ways, I’d love to hear about your methods in the comments below. Next week, we’ll conclude our RV winter living preparation series with Part II, focusing on sewer lines and internal RV plumbing.
Part II: Sewer Lines and RV Pipes
Continue to the next article on RV winter living preparation HERE.
Relevant Links:
Explore products frequently purchased by readers or shop on Amazon through these links. Your support is greatly appreciated!
Affiliate Link Disclosure: As an Amazon Associate, I earn from qualifying purchases.
Share: