
Winterizing a travel trailer camper is crucial for preventing costly damage from freezing temperatures, ensuring your family adventures can continue for years to come. At familycircletravel.net, we provide the expertise and resources you need to confidently prepare your camper for winter. Let’s explore how to protect your investment and keep your travel dreams alive with practical advice, step-by-step guides, and valuable insights, using terms such as RV antifreeze, water systems, and winter storage.
1. What Is The Importance Of Winterizing A Travel Trailer Camper?
Winterizing your travel trailer camper is vital to safeguard it from freeze damage, as water expands when frozen, potentially bursting pipes and damaging appliances. Neglecting this process can lead to expensive repairs and shorten the lifespan of your RV. According to the Family Travel Association, proactive RV maintenance, including winterization, can save families thousands of dollars in repair costs, ensuring more budget for future travel.
Why Winterizing Matters:
- Prevents Freeze Damage: Protects pipes, tanks, and appliances from bursting.
- Reduces Repair Costs: Avoids expensive repairs caused by water damage.
- Extends RV Lifespan: Ensures your camper remains in good condition for future trips.
- Maintains Value: Helps retain the resale value of your travel trailer.
Consequences of Neglecting Winterization:
- Burst Pipes: Frozen water can cause pipes to crack and leak.
- Damaged Appliances: Water heaters, refrigerators, and toilets can sustain damage.
- Mold and Mildew: Leaks can lead to mold growth, affecting air quality and health.
- Structural Damage: Repeated freeze-thaw cycles can weaken the RV’s structure.
2. What Tools And Materials Are Needed To Winterize A Travel Trailer Camper?
To properly winterize a travel trailer camper, gather essential tools and materials such as RV antifreeze, a water heater bypass kit, a siphon kit, and basic hand tools. Having the right equipment ensures you can complete the winterization process efficiently and effectively. Research from RV Magazine indicates that using quality materials and tools reduces the risk of damage during the winterization process.
Essential Tools and Materials:
| Tool/Material | Description |
|---|---|
| RV Antifreeze | Non-toxic antifreeze designed for RV plumbing systems |
| Water Heater Bypass Kit | Allows you to bypass the water heater, saving on antifreeze |
| Siphon Kit | Helps pump antifreeze through the water lines |
| Socket Wrench Set | For removing and installing drain plugs and anode rods |
| Screwdrivers (Phillips & Flathead) | Useful for removing access panels and tightening connections |
| Adjustable Wrench | For various plumbing connections |
| Teflon Tape | To seal threaded connections and prevent leaks |
| Air Compressor (Optional) | To blow out water lines |
| Hand Pump (Optional) | To manually pump antifreeze |
Tips for Gathering Supplies:
- Check RV Manual: Consult your RV’s manual for specific requirements.
- Buy Quality Antifreeze: Opt for RV-specific, non-toxic antifreeze.
- Inspect Tools: Ensure all tools are in good working condition.
- Create a Checklist: Use a checklist to ensure you have everything before starting.
3. How Do I Prepare My Travel Trailer Camper Before Winterizing?
Before you start winterizing, prepare your travel trailer camper by cleaning it thoroughly, removing perishable items, and inspecting all systems. Proper preparation sets the stage for a successful winterization, reducing the risk of issues during storage. According to the RV Safety & Education Foundation, a well-prepared RV is less likely to suffer from pest infestations and mold growth during the off-season.
Preparation Steps:
-
Clean the Interior:
- Remove all food items to prevent attracting pests.
- Clean and disinfect surfaces to prevent mold growth.
- Vacuum and sweep floors to remove debris.
-
Empty and Clean Tanks:
- Drain and flush both black and gray water tanks.
- Use tank cleaners to remove stubborn residue.
- Ensure tanks are completely empty.
-
Inspect Seals and Windows:
- Check for cracks or gaps around windows and doors.
- Seal any openings to prevent drafts and moisture.
- Apply weather stripping if necessary.
-
Remove Batteries:
- Disconnect and remove batteries to prevent discharge.
- Store batteries in a cool, dry place.
- Consider using a battery tender to maintain charge.
4. What Is The Step-By-Step Guide To Winterizing A Travel Trailer Camper?
Follow these detailed steps to winterize your travel trailer camper effectively: drain the water system, bypass the water heater, add RV antifreeze, and protect the exterior. A methodical approach ensures all components are protected from freezing temperatures. Research from Trailer Life Magazine emphasizes the importance of following each step carefully to prevent damage.
-
Drain the Water System:
- Drain Fresh Water Tank: Locate and open the fresh water tank drain valve. Allow all water to drain completely.
- Drain Water Heater: Turn off and cool down the water heater. Remove the drain plug or anode rod. Open the pressure relief valve to allow air in and speed up draining. Flush out any sediment.
- Open All Faucets: Open both hot and cold water faucets, including the shower and toilet, to allow water to drain from the lines.
- Locate and Open Low Point Drains: Find the low point drain valves (usually two, one for hot water and one for cold water lines) and open them to drain any remaining water.
- Use Air Compressor: Connect an air compressor to the city water inlet and blow out any remaining water in the lines. This helps ensure all water is removed.
-
Bypass the Water Heater:
- Locate Water Heater Bypass Valves: Access the back of the water heater (usually behind an interior panel). You should find one to three bypass valves.
- Adjust Bypass Valves: Close the valves that allow water to flow into the water heater and open the bypass valve to direct water around the water heater. This prevents antifreeze from filling the water heater tank.
-
Add RV Antifreeze:
- Locate Water Pump: Find the water pump, usually located near the fresh water tank.
- Disconnect Water Pump Inlet: Disconnect the water pump inlet hose from the fresh water tank.
- Attach Siphon Hose: Attach a siphon hose to the water pump inlet. Place the other end of the hose into a gallon of RV antifreeze.
- Turn On Water Pump: Turn on the water pump to draw antifreeze into the water lines.
- Open Each Faucet: Starting with the faucet furthest from the water pump, open both the hot and cold sides until you see pink antifreeze flowing. Close the faucet. Repeat this process for all faucets, showers, and toilets in the RV.
- Pour Antifreeze into Drains: Pour a cup of antifreeze down each drain (kitchen sink, bathroom sink, shower, and toilet) to protect the P-traps.
- Flush Toilet: Flush the toilet until you see antifreeze in the bowl.
-
Protect Exterior Components:
- Inspect Exterior Seals: Check all exterior seals around windows, doors, and vents. Seal any cracks with RV sealant.
- Cover Tires: Use tire covers to protect the tires from UV damage.
- Apply RV Cover: Use a breathable RV cover to protect the entire RV from the elements.
- Lubricate Locks and Hinges: Lubricate all locks and hinges with silicone spray to prevent corrosion.
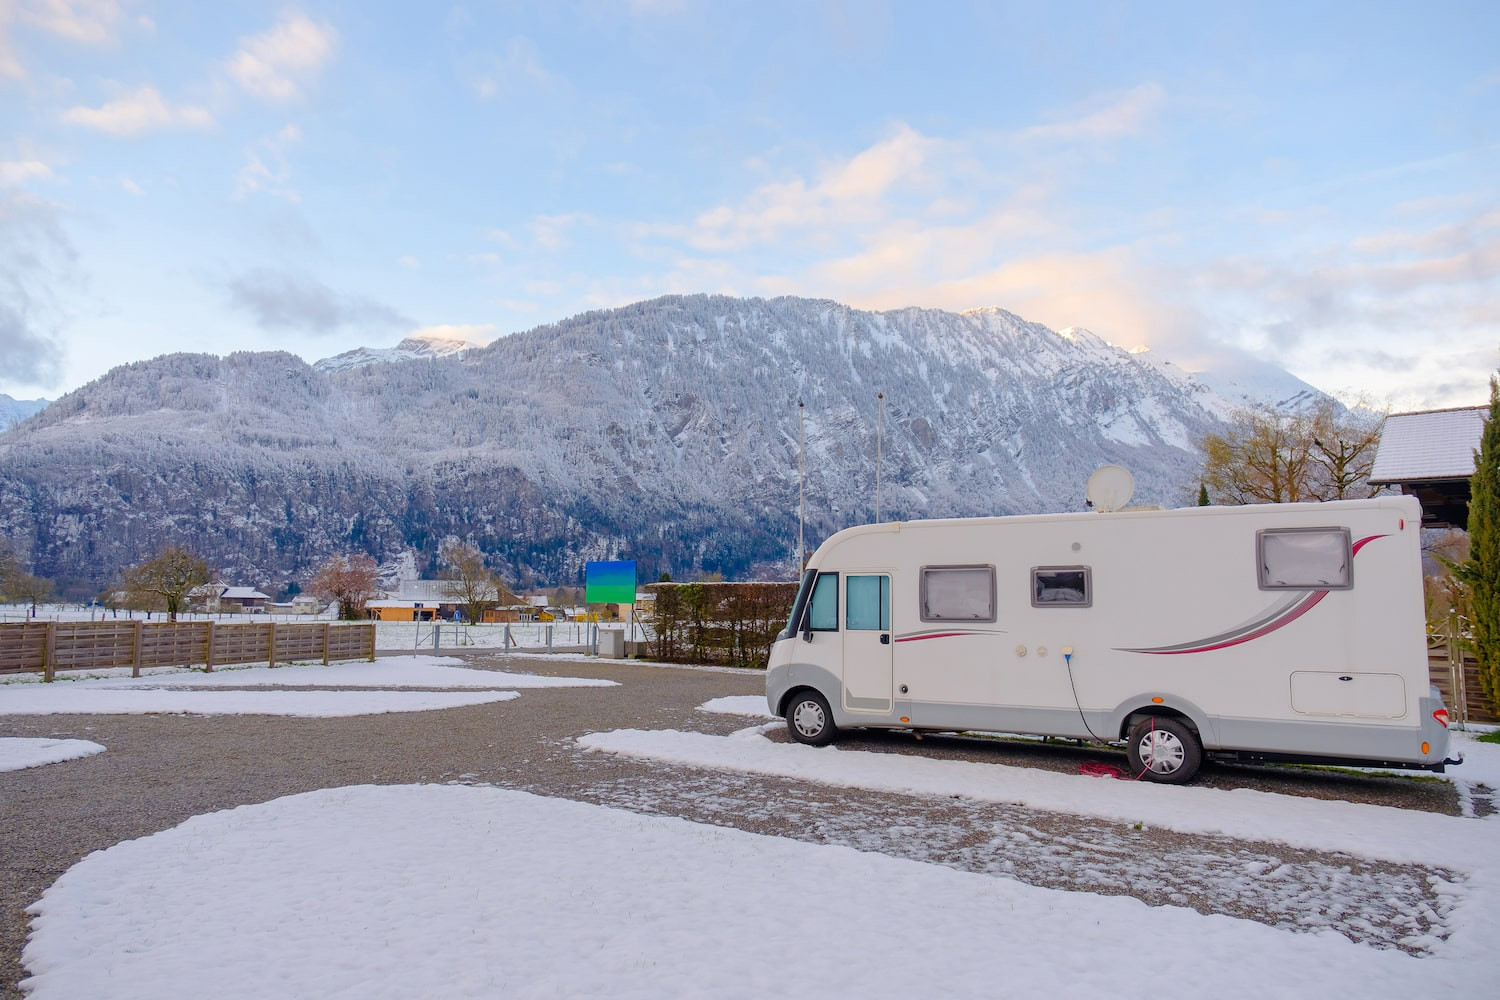 Travel trailer parked in a snowy landscape, winterized for protection.
5. How Do I Drain The Water System Of My Travel Trailer Camper?
Draining the water system involves emptying the fresh water tank, water heater, and all water lines to prevent freezing. Thoroughly draining the system is a critical step in winterization. The National RV Training Academy recommends using compressed air to ensure all water is removed from the lines.
Steps to Drain the Water System:
-
Drain the Fresh Water Tank:
- Locate the fresh water tank drain valve, typically found underneath the RV or inside a storage compartment.
- Open the valve and allow the tank to drain completely. Gravity will do most of the work, but you can speed up the process by opening a faucet to allow air into the tank.
-
Drain the Water Heater:
- Turn Off and Cool Down: Ensure the water heater is turned off and has cooled down to avoid burns.
- Remove Drain Plug: Locate the drain plug, usually at the bottom of the water heater. Use a socket wrench to remove it.
- Open Pressure Relief Valve: Open the pressure relief valve at the top of the water heater to allow air in and speed up the draining process.
- Flush Sediment: After the water has drained, briefly turn on the water pump to flush out any sediment.
-
Drain the Water Lines:
- Open All Faucets: Open all hot and cold water faucets inside the RV, including the kitchen, bathroom, and shower.
- Locate Low Point Drains: These are typically two separate valves or plugs located underneath the RV. One is for the hot water line, and the other is for the cold water line.
- Open Low Point Drains: Open the low point drains to allow water to drain from the lines.
-
Use Compressed Air (Recommended):
- Connect Air Compressor: Attach an air compressor to the city water inlet connection.
- Set Air Pressure: Set the air pressure to around 30-40 PSI to avoid damaging the plumbing.
- Blow Out Water Lines: Open each faucet, one at a time, and blow air through the lines until no more water comes out. Repeat for all faucets, showers, and the toilet.
6. What Is The Proper Way To Add RV Antifreeze To A Travel Trailer Camper?
Adding RV antifreeze involves bypassing the water heater and pumping the antifreeze through all water lines to protect them from freezing. Proper antifreeze application ensures complete protection. According to research from the University of Michigan, using the correct type and amount of antifreeze is crucial for preventing damage.
Steps to Add RV Antifreeze:
-
Bypass the Water Heater:
- Locate the bypass valves at the back of the water heater.
- Turn the valves to bypass the water heater, preventing antifreeze from entering it.
-
Prepare the Water Pump:
- Locate the water pump, usually near the fresh water tank.
- Disconnect the inlet hose from the fresh water tank.
- Attach a siphon hose to the water pump inlet. Place the other end of the hose into a gallon of RV antifreeze.
-
Pump Antifreeze Through the Lines:
- Turn on the water pump. It will begin to draw antifreeze from the gallon container.
- Starting with the faucet furthest from the water pump, open both the hot and cold sides until you see pink antifreeze flowing. Close the faucet.
- Repeat this process for all faucets, showers, and toilets in the RV.
- Flush the toilet until you see antifreeze in the bowl.
-
Pour Antifreeze into Drains:
- Pour a cup of antifreeze down each drain (kitchen sink, bathroom sink, shower, and toilet) to protect the P-traps.
Tips for Adding Antifreeze:
- Use RV-Specific Antifreeze: Ensure you are using non-toxic RV antifreeze, not automotive antifreeze.
- Monitor Antifreeze Level: Keep an eye on the antifreeze level in the gallon container to ensure the pump doesn’t run dry.
- Work Methodically: Follow a systematic approach to ensure all lines are filled with antifreeze.
- Check for Leaks: As you pump antifreeze through the lines, check for any leaks.
7. How Can I Protect The Exterior Of My Travel Trailer Camper During Winter?
Protecting the exterior involves covering the RV, sealing any openings, and protecting the tires from UV damage. Exterior protection prevents weather-related damage during storage. A study by the National Association of RV Parks and Campgrounds suggests that RV covers can significantly reduce the risk of exterior damage during winter.
Exterior Protection Steps:
-
Wash and Wax the RV:
- Thoroughly wash the exterior of the RV to remove dirt and grime.
- Apply a coat of RV wax to protect the paint and fiberglass from UV damage.
-
Inspect and Seal Openings:
- Check all seams, windows, doors, and vents for cracks or gaps.
- Use RV sealant to seal any openings, preventing water intrusion.
-
Cover the RV:
- Invest in a high-quality, breathable RV cover.
- Ensure the cover fits snugly but allows for air circulation to prevent moisture buildup.
-
Protect the Tires:
- Use tire covers to protect the tires from UV damage.
- Consider placing the tires on wood blocks to prevent direct contact with the ground.
-
Lubricate Locks and Hinges:
- Apply silicone lubricant to all locks and hinges to prevent corrosion and ensure smooth operation.
8. What Are Some Common Mistakes To Avoid When Winterizing A Travel Trailer Camper?
Avoid common mistakes such as forgetting to bypass the water heater, using the wrong type of antifreeze, and neglecting to drain all water lines. Awareness of these pitfalls can prevent costly damage. Experts at Camping World emphasize the importance of following instructions carefully and double-checking all steps.
Common Mistakes to Avoid:
-
Forgetting to Bypass the Water Heater:
- Problem: Failing to bypass the water heater means you’ll need to fill the entire tank with antifreeze, wasting a significant amount.
- Solution: Always bypass the water heater before adding antifreeze.
-
Using the Wrong Type of Antifreeze:
- Problem: Automotive antifreeze is toxic and can damage your RV’s plumbing system.
- Solution: Use only non-toxic RV antifreeze.
-
Not Draining All Water Lines:
- Problem: Residual water in the lines can freeze and cause pipes to burst.
- Solution: Ensure all water lines are completely drained, using compressed air if necessary.
-
Neglecting to Protect the Exterior:
- Problem: Exposure to the elements can cause damage to the RV’s exterior, including fading, cracking, and leaks.
- Solution: Cover the RV with a breathable cover and seal any openings.
-
Ignoring the RV’s Manual:
- Problem: Every RV is different, and your RV’s manual contains specific winterization instructions.
- Solution: Always consult your RV’s manual for detailed instructions.
9. How Do I Maintain My Winterized Travel Trailer Camper During The Winter Months?
During winter, periodically check your winterized travel trailer camper for any signs of damage or intrusion, ensuring continued protection. Regular checks can identify and address potential issues early. The RV Owners Association recommends monthly inspections to maintain the integrity of the winterization.
Maintenance Tips:
-
Regular Inspections:
- Visit your storage location at least once a month.
- Check for any signs of water leaks, pest intrusion, or damage to the RV cover.
-
Check the RV Cover:
- Ensure the RV cover remains securely in place.
- Repair any tears or damage to the cover promptly.
-
Monitor Tire Pressure:
- Check the tire pressure and inflate as needed.
- Ensure tires are protected from direct sunlight.
-
Ventilation:
- Ensure adequate ventilation to prevent moisture buildup inside the RV.
- Use moisture absorbers if necessary.
-
Battery Maintenance (If Applicable):
- If you left the batteries in the RV, check their charge level regularly.
- Use a battery maintainer to keep the batteries fully charged.
10. How Do I De-Winterize My Travel Trailer Camper In The Spring?
De-winterizing involves flushing the antifreeze from the water system, sanitizing the tanks, and inspecting all systems before your first trip. Proper de-winterization ensures your RV is ready for safe and enjoyable travel. According to the RV Inspection Connection, a thorough de-winterization process is essential for preventing health issues and system malfunctions.
De-Winterization Steps:
-
Flush the Water System:
- Connect the RV to a fresh water source.
- Open all faucets (hot and cold) and let the water run until it runs clear and no longer smells of antifreeze.
- Flush the toilet several times.
-
Sanitize the Water System:
- Mix a solution of 1/4 cup of household bleach per 15 gallons of water.
- Pour the bleach solution into the fresh water tank.
- Turn on the water pump and run the solution through all faucets and the toilet until you smell bleach.
- Let the solution sit in the water lines for at least 4 hours (or overnight).
- Drain the bleach solution and flush the system with fresh water until the bleach smell is gone.
-
Inspect and Reconnect Components:
- Remove the water heater bypass and return the valves to their normal operating positions.
- Install a new water filter.
- Reconnect the water pump inlet hose to the fresh water tank.
- Install a new anode rod in the water heater.
-
Check for Leaks:
- Turn on the water pump and check all faucets, connections, and water lines for leaks.
- Repair any leaks immediately.
-
Test Appliances:
- Test all appliances, including the water heater, refrigerator, stove, and air conditioner.
- Ensure all appliances are functioning properly.
 Man de-winterizing a travel trailer, checking water lines and connections.
FAQ About Winterizing a Travel Trailer Camper
-
Can I Use Regular Automotive Antifreeze In My Travel Trailer Camper?
No, never use automotive antifreeze in your travel trailer camper. Automotive antifreeze is toxic and can contaminate your RV’s water system. Always use non-toxic RV antifreeze, which is specifically designed for potable water systems.
-
How Much RV Antifreeze Do I Need To Winterize My Travel Trailer Camper?
The amount of RV antifreeze needed depends on the size of your travel trailer camper and the length of its plumbing system. A general guideline is to have at least 2-3 gallons of RV antifreeze on hand. It’s always better to have a little extra than to run out in the middle of the winterization process.
-
Do I Need To Bypass My Water Heater When Winterizing My Travel Trailer Camper?
Yes, it is essential to bypass the water heater when winterizing your travel trailer camper. Bypassing the water heater prevents antifreeze from filling the entire tank, which would require a significant amount of antifreeze. Most RVs have bypass valves installed for this purpose.
-
What Happens If I Forget To Winterize My Travel Trailer Camper?
If you forget to winterize your travel trailer camper, the water in the plumbing system can freeze and expand, causing pipes to burst, fittings to crack, and appliances to be damaged. These repairs can be costly and time-consuming.
-
Can I Use An Air Compressor Instead Of RV Antifreeze To Winterize My Travel Trailer Camper?
While an air compressor can be used to blow out the water lines, it is not a substitute for RV antifreeze. Compressed air can remove most of the water, but it cannot protect against residual water freezing in low spots or traps. RV antifreeze provides added protection against freezing.
-
How Do I Know If I Have Successfully Winterized My Travel Trailer Camper?
You’ll know you have successfully winterized your travel trailer camper when you have followed all the steps outlined in this guide, including draining the water system, bypassing the water heater, adding RV antifreeze to all water lines and drains, and protecting the exterior of the RV.
-
Should I Remove My RV Battery During The Winter?
Yes, it is generally recommended to remove your RV battery during the winter. Batteries can discharge over time, especially in cold temperatures. Removing the battery and storing it in a cool, dry place can help prolong its life.
-
How Often Should I Check On My Winterized Travel Trailer Camper?
You should check on your winterized travel trailer camper at least once a month during the winter. This allows you to monitor for any signs of water leaks, pest intrusion, or damage to the RV cover.
-
What Do I Do If I Find A Leak In My Winterized Travel Trailer Camper?
If you find a leak in your winterized travel trailer camper, take immediate action to stop the leak and prevent further damage. This may involve patching the leak, draining the water system, and adding more RV antifreeze.
-
Is It Worth Paying A Professional To Winterize My Travel Trailer Camper?
Paying a professional to winterize your travel trailer camper can be a good option if you are not comfortable doing it yourself or if you want to ensure that the job is done correctly. Professionals have the experience and expertise to properly winterize your RV and can identify potential problems before they cause damage.
Winterizing Your Travel Trailer: Familycircletravel.net Can Help
Winterizing your travel trailer camper is essential for protecting it from freeze damage and ensuring it’s ready for your next family adventure. By following these steps and avoiding common mistakes, you can confidently prepare your RV for winter storage. Visit familycircletravel.net for more detailed guides, tips, and resources to help you plan unforgettable family trips. Explore our destination guides, activity ideas, and accommodation reviews to create the perfect family vacation. Start planning your next adventure today and let familycircletravel.net be your trusted resource for all your family travel needs!
Address: 710 E Buena Vista Dr, Lake Buena Vista, FL 32830, United States.
Phone: +1 (407) 824-4321.
Website: familycircletravel.net.