
Traveling cigar aficionados understand the paramount importance of keeping their precious cigars in optimal condition. The challenge? Maintaining the perfect humidity level while on the move. Forget about lugging around bulky, traditional humidors. The solution is surprisingly simple and budget-friendly: a DIY Travel Humidor. Inspired by a clever idea from a visiting father, we’ll show you how to create your own travel humidor using everyday household items, ensuring your cigars remain fresh and ready to enjoy, wherever your adventures take you.
Why a Travel Humidor is Essential
Before we dive into the DIY process, let’s understand why a travel humidor is not just a luxury, but a necessity for cigar lovers on the go. Cigars are delicate and highly susceptible to environmental changes, especially humidity. Too much humidity, and they can become overly moist, leading to mold and an unpleasant smoking experience. Too little humidity, and they dry out, losing their flavor and becoming brittle.
A quality travel humidor acts as a protective shield, maintaining the ideal humidity level—around 65-72%—necessary to preserve the integrity, flavor, and burn quality of your cigars. Whether you’re heading to a destination wedding, a weekend getaway, or simply want to have your favorite smokes readily available during travels, a travel humidor is your best companion.
DIY Travel Humidor: What You’ll Need
The beauty of this DIY project lies in its simplicity and affordability. You likely have most, if not all, of these items at home already. Here’s what you’ll need to build your own effective travel humidor:
- Rectangular Plastic Container with Airtight Lid (24oz recommended): A food-grade plastic container with a secure, airtight lid is crucial. A rectangular shape maximizes space efficiency for cigars compared to round containers. The 24oz size is a good starting point, but adjust based on your cigar quantity and sizes. Ensure the lid creates a tight seal to lock in humidity.
- Clean Kitchen Sponge (Non-Scented): A regular, non-scented kitchen sponge will act as our humidifying element. Avoid sponges with added chemicals or fragrances that could taint your cigars.
- Two Ziploc Plastic Bags (Small, Sandwich Size): These bags will house the damp sponge and prevent direct contact with your cigars, while still allowing humidity to permeate.
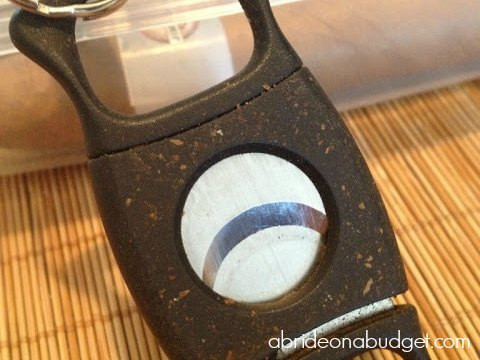
- Cigar Cutter: Absolutely essential for preparing your cigars for smoking. A travel-sized cutter is ideal for portability.
- Rubber Band (Optional, for Extra Security): A rubber band can provide extra security to ensure the container lid stays tightly sealed, especially during travel.
 A clear rectangular plastic container with a blue lid, sponge, plastic bags, cigar cutter, and rubber band laid out on a wooden surface, ready to be assembled into a DIY travel humidor.
Step-by-Step Guide to Make Your Own Travel Humidor
Creating your DIY travel humidor is a straightforward process that takes just minutes. Follow these simple steps to ensure your cigars are travel-ready:
1. Prepare the Container
Start with your clean, rectangular plastic container. Ensure it’s thoroughly clean and dry before you begin. The rectangular shape is optimal as it fits cigars neatly without wasting space, unlike round containers. Avoid square containers if you plan to carry longer cigars, as they may not fit comfortably. The airtight lid is paramount—this is what will maintain the humid environment inside.
 Close-up shot of a hand holding a clear rectangular plastic container, showcasing its shape and the airtight seal of the lid.
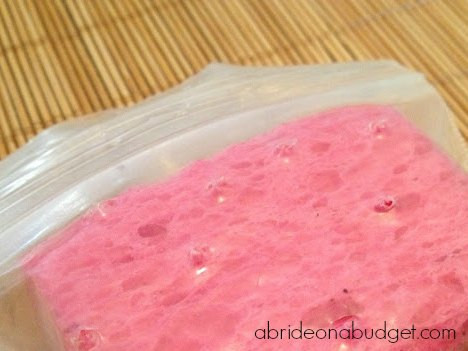
2. Prepare the Sponge Humidifier
The sponge is the heart of our DIY humidor, providing the necessary humidity. Take your clean sponge and thoroughly dampen it with distilled water. It’s crucial to use distilled water, not tap water, as tap water contains minerals and chemicals that can be harmful to cigars and may cause mold growth. After wetting the sponge, wring it out thoroughly to remove excess water. The sponge should be damp, not dripping wet.
Next, place the damp sponge inside one of your plastic bags and seal the bag. Then, take a sharp object, like a pin or the tip of your cigar cutter, and carefully poke several small holes in both sides of the plastic bag. These holes will allow humidity to slowly release from the sponge, humidifying the container, while the bag prevents direct contact and water damage to your cigars.
 A hand preparing the humidifying element by placing a damp sponge inside a plastic bag and poking holes in it with a cigar cutter.
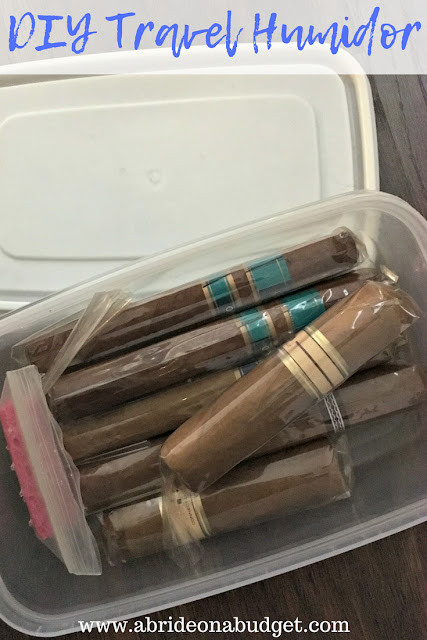
3. Assemble Your Travel Humidor
Now it’s time to put it all together. Place your cigars inside the plastic container, arranging them neatly. Then, place the plastic bag containing the damp sponge inside the container as well. Position the sponge bag in a way that it doesn’t directly press against the cigars, perhaps at one end or side of the container.
 Cigars being placed inside the plastic container, followed by the bagged damp sponge, demonstrating the assembly of the DIY travel humidor.
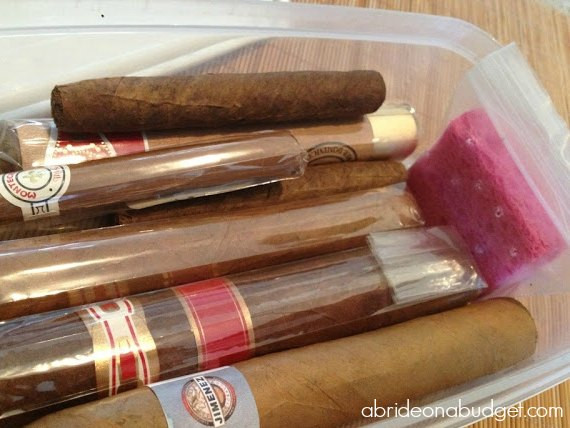
4. Don’t Forget the Cigar Cutter
A travel humidor wouldn’t be complete without a cigar cutter. Place your cigar cutter in the second plastic bag to keep it separate and prevent any potential damage to your cigars. Position the bagged cutter on top of the cigars inside the container. While a lighter is also essential for enjoying your cigars, it’s best to carry it separately to avoid any accidental ignition.
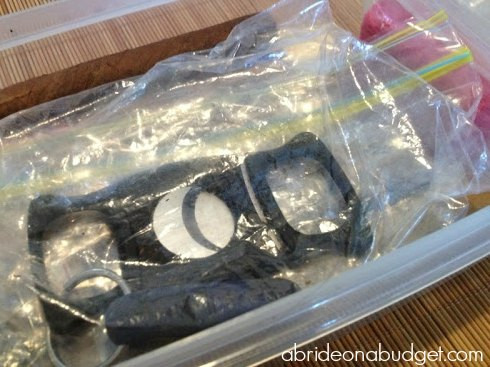 A cigar cutter being placed in a plastic bag and then positioned on top of the cigars inside the DIY travel humidor, alongside the bagged sponge.
5. Seal and Secure
Finally, close the lid of the plastic container tightly to create an airtight seal. For added security, especially during travel, you can wrap a rubber band around the container to ensure the lid stays firmly in place. Your DIY travel humidor is now complete and ready to protect your cigars on your journey!
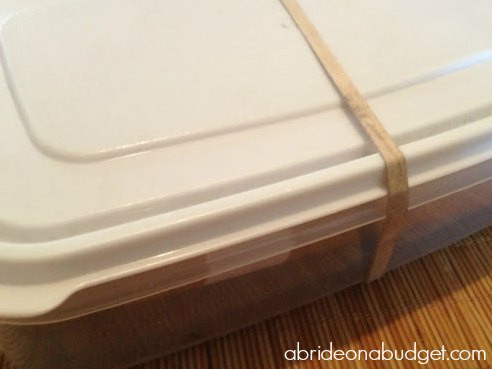 The DIY travel humidor is shown with the lid securely closed and a rubber band wrapped around it for extra protection, ready for travel.
The Cost-Effective and Practical Choice
Compared to commercially available travel humidors, which can easily cost upwards of $20 or more for basic models, this DIY approach is incredibly budget-friendly. You can likely assemble this travel humidor for virtually nothing, using items already in your home. Beyond the cost savings, this DIY solution is also highly practical and customizable to your specific needs. It’s lightweight, durable, and effectively maintains the humidity needed to keep your cigars in top condition.
Whether you’re a frequent traveler or just need a reliable way to transport your cigars occasionally, this DIY travel humidor is a game-changer. It’s a testament to the fact that sometimes, the best solutions are the simplest and most resourceful. So, before your next trip, take a few minutes to create your own travel humidor and ensure your cigars arrive in perfect smoking condition.